Start with high-quality cannabis flower or trim, decarboxylating it at 240°F for 40 minutes to activate the THC and CBD before infusing. This crucial step transforms inactive cannabinoids into their therapeutic forms—skip it, and your oil won’t deliver the effects you’re expecting.
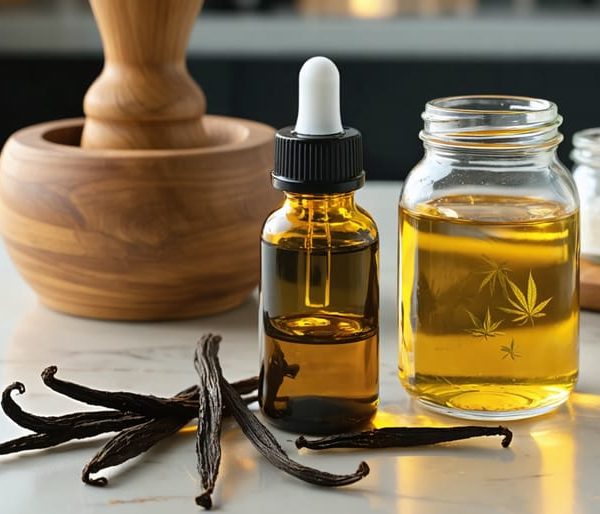
Choose a carrier oil that matches your intended use: coconut oil works beautifully for edibles and topicals due to its high fat content and stability, while olive oil offers a lighter option for cooking and salad dressings. The fat molecules bind with cannabinoids, creating a potent infusion you can customize to your preferred strength.
Control your potency by calculating the ratio of cannabis to oil—a general starting point is 1 cup of oil to 7-10 grams of flower, yielding approximately 5-8mg THC per teaspoon, though this varies based on your source material’s strength. Keep detailed notes on your first batch so you can adjust future recipes to match your ideal dosage.
Infuse your decarboxylated cannabis with your chosen oil using gentle, consistent heat between 160-200°F for 2-4 hours, whether you’re using a slow cooker, double boiler, or specialized infusion machine. Lower temperatures preserve delicate terpenes and prevent degradation, while longer infusion times ensure maximum cannabinoid transfer.
Within Canada’s legal framework for personal cannabis use, making infused oils at home lets you create customized products tailored to your wellness needs while maintaining complete control over ingredients and potency—something commercial products rarely offer at this level of personalization.
Why Infused Oils Are Worth Making at Home
Making your own cannabis-infused oils at home offers several compelling advantages that go beyond just the satisfaction of a DIY project. The most immediate benefit is cost savings. When you compare the price of premium infused oils at dispensaries to making your own with legally purchased cannabis, the difference is substantial. A single bottle of quality cannabis oil can run upwards of $50-80, while the same amount made at home typically costs a fraction of that price, especially if you’re working with trim or lower-grade flower.
Control is another major factor. When you make infused oils yourself, you decide exactly what goes into the bottle. You choose the carrier oil, whether that’s coconut, olive, or MCT oil. You select the cannabis strain based on your desired effects and terpene profiles. Most importantly, you determine the potency. Store-bought options come in fixed concentrations, but homemade versions can be tailored to your exact needs, whether you prefer microdosing or stronger preparations.
Under Canadian law, adults can possess up to 30 grams of dried cannabis or its equivalent in other forms. Making infused oils at home falls within legal parameters for personal use, giving you the freedom to experiment with different preparations without worrying about possession limits for finished products.
I remember my first attempt at making cannabis oil. I was nervous about getting the temperature right and worried I’d waste good flower. The house smelled incredible, though my partner wasn’t thrilled about that part. When I finally strained my first batch and tasted a small amount in tea that evening, the sense of accomplishment was incredible. The versatility alone makes it worthwhile. Use your infused oil in cooking, baking, topicals, or simply taken sublingually. One batch opens up countless possibilities.
What You Need to Know Before You Start

Choosing Your Carrier Oil
Selecting the right carrier oil is crucial for your infusion because cannabinoids are fat-soluble, meaning they bind to fats rather than water. The higher the fat content in your carrier oil, the more efficiently it will absorb and hold those beneficial compounds. Here’s a breakdown of the most popular options to help you decide what works best for your needs.
Coconut oil remains a favorite for making cannabis coconut oil, and for good reason. With about 90% saturated fat content, it’s excellent at capturing cannabinoids. It stays solid at room temperature, making it perfect for baking or creating topicals. The tropical flavor works well in some recipes but might not suit everyone’s taste. If you’re watching calories, note that it’s quite dense.
Olive oil offers a milder flavor profile and contains healthy monounsaturated fats, though its overall fat content is slightly lower than coconut oil. It’s ideal for savory dishes, salad dressings, or drizzling over finished meals. Extra virgin varieties provide additional antioxidants but have a lower smoke point, so avoid high-heat cooking.
MCT oil, derived from coconut or palm kernel oil, is flavorless and remains liquid at all temperatures. It’s particularly easy for your body to digest and absorb, making it popular for tinctures and adding to beverages.
Avocado oil boasts a high smoke point and neutral taste, plus it’s packed with beneficial fatty acids. It’s pricier than other options but works wonderfully for high-heat cooking methods.
Understanding Decarboxylation (The Step You Can’t Skip)
Before your cannabis can work its magic in infused oils, it needs activation—a process called decarboxylation. Here’s the thing: raw cannabis contains THCA and CBDA, which are non-intoxicating compounds. Your body can’t effectively use them until heat transforms them into THC and CBD. Think of it like activating yeast in baking—skip this step, and your final product simply won’t deliver the effects you’re expecting.
The good news? Decarboxylation isn’t complicated at all. You’re essentially just gently heating your cannabis in the oven. The sweet spot is 240°F (115°C) for 30-40 minutes. Some people prefer lower temperatures like 220°F for up to 45 minutes to preserve more terpenes, those aromatic compounds that contribute to flavour and effects.
How do you know it’s working? Your cannabis will shift from bright green to a toasted, brownish-green colour. You’ll notice the smell too—it becomes more pungent and fills your kitchen with that distinctive aroma. If you’re concerned about discretion, seal your cannabis in an oven-safe bag before heating.
The most common mistake I see is impatience. Cranking the temperature too high might seem like a time-saver, but temperatures above 300°F will actually destroy those valuable cannabinoids you’re trying to activate. On the flip side, under-decarbing means weaker potency and wasted product.
I remember my first attempt—I was so nervous about burning it that I barely heated it at all. The resulting oil was disappointingly mild. Now I set a timer, trust the process, and consistently get reliable results. You will too.

Calculating Potency for Safe Dosing
Understanding the potency of your infused oil helps you dose safely and consistently. Here’s a straightforward formula to estimate your oil’s strength:
Total THC or CBD (in mg) = (grams of cannabis × percentage of THC or CBD × 1000) × 0.90
That 0.90 accounts for roughly 10% loss during the infusion process. Let’s walk through a practical example: if you infuse 7 grams of cannabis containing 15% THC into 1 cup (240ml) of oil, you’d calculate: (7 × 0.15 × 1000) × 0.90 = 945mg of THC total.
To find the potency per serving, divide by your cup measurement. If using teaspoons: 945mg ÷ 48 teaspoons = approximately 19.7mg THC per teaspoon.
Under Canadian regulations, you’re responsible for your own dosing at home. I always recommend starting with just one-quarter teaspoon if you’re new to edibles—that’s roughly 5mg in this example. Wait at least two hours before considering more, since edibles take longer to kick in than other consumption methods.
When I first started making infused oils, I learned this lesson the hard way by being impatient. Trust the process, start low, and go slow. You can always take more next time, but you can’t undo an uncomfortable experience.
The Classic Stovetop Method
The stovetop method is the time-tested approach that many home infusers swear by. I remember the first time I made cannabis oil this way – my kitchen smelled amazing, and I felt like I was creating something truly special. This method gives you complete control over the process and doesn’t require any specialty equipment beyond what’s already in your kitchen.
What You’ll Need:
– 1 cup of carrier oil (coconut oil, olive oil, or avocado oil work beautifully)
– 7-10 grams of decarboxylated cannabis flower (or 3.5 grams for a gentler potency)
– A medium saucepan or double boiler
– Candy or instant-read thermometer
– Cheesecloth or fine-mesh strainer
– Glass storage jar with tight-fitting lid
The Process:
Start by ensuring your cannabis is properly decarboxylated. This crucial step activates the cannabinoids, transforming THCA into THC and CBDA into CBD. If you’ve skipped this step, your oil won’t have the potency you’re expecting.
Pour your carrier oil into the saucepan and add your decarboxylated cannabis. If you’re using a regular saucepan rather than a double boiler, set your burner to the lowest possible setting. The goal is to maintain a temperature between 160-180°F (70-82°C) throughout the infusion. This is where your thermometer becomes essential – temperatures above 200°F can degrade cannabinoids and create a burnt, unpleasant taste.
Let the mixture simmer gently for 2-3 hours, checking the temperature every 20-30 minutes. You should see tiny bubbles occasionally rising to the surface, but never a rolling boil. Stir the mixture every half hour to ensure even infusion and prevent sticking.
Here’s a tip from my early mistakes: if your temperature starts climbing too high, simply remove the pan from heat for a few minutes. It’s better to extend your infusion time than risk overheating.
Straining and Storage:
Once your infusion time is complete, remove the pan from heat and let it cool for about 10 minutes. Line your strainer with cheesecloth and position it over your storage jar. Pour the oil mixture through slowly, allowing gravity to do most of the work. Resist the urge to squeeze the cheesecloth too aggressively – this can push plant material and chlorophyll into your finished product, creating a bitter taste.
Store your finished oil in a cool, dark place or in the refrigerator. Properly stored infused oil typically stays fresh for up to six months, though coconut oil-based infusions can last even longer.
Common troubleshooting: If your oil seems weak, you may have used insufficiently decarboxylated cannabis or maintained too low a temperature during infusion. A burnt smell indicates overheating – next time, watch that thermometer more carefully and don’t hesitate to adjust your heat source.

The Slow Cooker Method (My Personal Favorite)
I’ll be completely honest with you – I used to avoid making infused oil because I thought it required constant attention and precise temperature monitoring. That changed when a friend convinced me to try her slow cooker method during a rainy weekend. I set everything up, went about my day, and came back to perfectly infused oil without any stress or burnt batches. I’ve never looked back.
The slow cooker method is hands-down the easiest way to make cannabis-infused oil at home. It maintains consistent low temperatures, requires minimal supervision, and produces reliably potent results every single time.
Here’s what you’ll need:
For the basic ratio, use 1 cup of carrier oil (coconut, olive, or avocado oil work beautifully) to 7-10 grams of decarboxylated cannabis. This creates a moderately strong infusion that’s versatile for cooking and direct use.
Start by adding your carrier oil to the slow cooker, then mix in your decarboxylated cannabis. Set your slow cooker to the low setting – this typically maintains temperatures between 160-180°F, which is exactly where you want to be. Give everything a gentle stir to ensure the plant material is fully submerged.
Now comes the easy part: let it cook for 4-8 hours. I usually aim for 6 hours as my sweet spot, but anywhere in that range works well. The longer infusion time allows for thorough extraction without any risk of overheating. Check on it occasionally and give it a stir every couple of hours if you’re home, but honestly, it’s pretty forgiving if you forget.
One question I get frequently from apartment dwellers: what about the smell? Here’s my trick – keep the lid on throughout the process and run a small fan near an open window if possible. The slow cooker’s sealed environment contains most of the aroma, making it far more discreet than stovetop methods. I’ve made batches in my small Toronto apartment without any complaints from neighbors.
When your timer goes off, strain the oil through cheesecloth into a glass jar, let it cool, and store it in a dark cupboard. The hands-off nature of this method means you can infuse oil while doing laundry, working from home, or binge-watching your favorite series. It’s truly that simple.
The Quick Oven Method for Smaller Batches
If you’re just starting your cannabis oil journey or want to test the process before committing to larger quantities, the quick oven method is your best friend. I remember making my first small batch this way, nervously checking the oven every ten minutes. The beauty of this approach is that it’s forgiving, fast, and perfect for experimenting without using up your entire stash.
Here’s what you’ll need: 7 grams of decarboxylated cannabis, 1 cup of your chosen carrier oil (coconut or olive oil work wonderfully), and an oven-safe glass container with a lid. You’ll also want an oven thermometer to ensure accuracy, since oven dials can be surprisingly unreliable.
Start by preheating your oven to 200°F (93°C). Once it reaches temperature, combine your decarbed cannabis and oil in the glass container, securing the lid loosely to allow steam to escape. Place the container on a baking sheet (this catches any potential spills) and into the oven it goes.
Let everything infuse for 90 minutes, gently stirring every 30 minutes. The low temperature extracts the cannabinoids without degrading them, giving you a potent final product. When time’s up, remove the container carefully using oven mitts, let it cool for 15 minutes, then strain through cheesecloth into your storage jar.
Safety is paramount here. Always use oven mitts when handling hot containers, ensure proper ventilation in your kitchen, and never leave your oven unattended. The oil will be extremely hot, so patience during cooling is essential.
This method shines when you’re working with small amounts, testing new strains, or simply want results without the all-day commitment. It’s straightforward, controllable, and gives you confidence before scaling up.
CBD-Specific Oil Recipes
CBD-infused oils deserve special attention because they work a bit differently than THC oils. Since CBD doesn’t intoxicate you, people often use it throughout the day for wellness purposes, which means the carrier oil and ratios matter in slightly different ways.
For CBD flower infusions, I recommend using MCT oil or light olive oil as your carrier. MCT oil absorbs quickly and has a neutral taste, making it perfect for sublingual use or adding to smoothies. The process is similar to THC infusions, but you’ll want a slightly higher ratio since CBD flowers typically contain 10-20% CBD compared to the higher THC percentages in cannabis strains.
Start with a 1:10 ratio for a potent CBD oil. That’s 10 grams of decarboxylated CBD flower (remember, CBD also needs decarboxylation at 240°F for 40 minutes) to 1 cup of carrier oil. Use your slow cooker on low for 4-6 hours, stirring occasionally. This yields approximately 10-15mg CBD per milliliter, perfect for daily wellness doses of 15-30mg.
If you’re working with CBD isolate, the math becomes beautifully simple. Mix 1000mg of CBD isolate with 100ml of MCT oil, gently warming it while stirring until fully dissolved. No decarboxylation needed since isolate is already activated. This creates a precise 10mg per milliliter concentration.
One thing I’ve learned from experience: CBD oils don’t need the same lengthy infusion time as THC oils. CBD binds readily to fats, so 4 hours is plenty. Going longer doesn’t significantly increase potency and can create a grassier taste.
For everyday use, I keep my CBD oil in a small dropper bottle in my kitchen. It’s legal across Canada for adults to make and use, which means you can confidently incorporate it into your morning coffee, post-workout shake, or evening tea. Many people find CBD oils helpful for managing daily stress, supporting sleep routines, or addressing minor discomforts without any intoxicating effects.
Store your finished CBD oil in a cool, dark place, and it’ll maintain potency for several months.
How to Use Your Cannabis-Infused Oil
Once you’ve made your cannabis-infused oil, the possibilities extend far beyond just baking with cannabis oil or making cannabis edibles. Understanding the various application methods helps you customize your experience based on your needs and preferences.
For culinary use, simply substitute your infused oil for regular oil in any recipe. I love adding a teaspoon to my morning coffee or smoothie for a sustained effect throughout the day. Mix it into salad dressings, drizzle over popcorn, or stir into soups after cooking to preserve potency.
Sublingual dosing offers faster absorption. Place a few drops under your tongue and hold for 60-90 seconds before swallowing. This method bypasses digestion, providing effects within 15-30 minutes rather than the typical 1-2 hours with edibles.
For topical applications, cannabis oil can be applied directly to skin for localized relief without psychoactive effects. Many Canadians combine it with unscented lotions or create massage oils for muscle tension.
Capsule-making provides precise, convenient dosing. Purchase empty gel capsules from Canadian health stores and fill with your measured oil using a dropper. Store in a cool, dark place and label clearly with dosage information.
Start with small amounts regardless of application method. I recommend beginning with 2.5-5mg THC or 10-15mg CBD and waiting at least two hours before consuming more. Keep detailed notes about dosage and effects to find your ideal amount.

Storage Tips and Shelf Life
Proper storage is essential for keeping your infused oils safe and effective. I learned this the hard way when my first batch went rancid because I left it on the counter in a clear jar! Now I always use dark glass bottles, like amber or cobalt blue, which protect the oil from light degradation. Store your infused oils in a cool, dark place like a cupboard, or refrigerate them for extended freshness.
The shelf life depends on your carrier oil. Coconut oil typically lasts 6-12 months at room temperature, while olive oil is best used within 3-6 months. MCT oil generally stays fresh for about a year. Refrigeration can extend these timeframes, though coconut oil will solidify.
Always label your containers clearly with the date, strain used, and estimated potency. In Canada, it’s particularly important to mark cannabis products clearly and keep them securely stored away from children and pets, as required by law.
Watch for signs of spoilage: off smells, cloudy appearance, or mold growth. When in doubt, throw it out. Starting with fresh, high-quality carrier oils and maintaining clean preparation practices will give you the longest lasting results.
Troubleshooting Common Problems
Even with careful preparation, you might encounter a few hiccups along the way. Here’s how to address the most common issues I’ve seen—and experienced myself.
If your oil feels weak or you’re not getting the effects you expected, potency is likely the culprit. This usually happens when the decarboxylation wasn’t complete or the infusion time was too short. Next time, ensure your oven temperature is accurate (an oven thermometer helps), and don’t rush the infusion process. Remember that potency also depends on your starting material’s THC or CBD content.
A burnt taste is unfortunately common and typically means your temperature was too high during infusion. Cannabis compounds degrade above 180°C (356°F), so always stay within the 60-82°C (140-180°F) range. If damage is done, there’s no fixing the batch, but you can try improving the taste of future batches by monitoring heat more carefully and considering flavour additions.
Separation issues, where plant material and oil don’t blend properly, often result from insufficient stirring or poor straining. During infusion, give your mixture a gentle stir every 30 minutes. Strain through multiple layers of cheesecloth, squeezing gently to extract maximum oil without forcing plant particles through.
If your oil feels too strong, simply dilute it with more carrier oil. This doesn’t waste your work—it just adjusts the concentration to something more comfortable for your tolerance.
For smell management, use your kitchen exhaust fan, simmer a pot of water with lemon and cinnamon nearby, or crack a window. The smell is strongest during decarboxylation but manageable with airflow. In Canada, since home production is legal, you’re within your rights to make infused oils, but being considerate of neighbours never hurts.
You’ve made it this far, which means you’re ready to create your own cannabis-infused oils at home. My advice? Start with whichever method feels most comfortable to you. If you’re new to this, the slow cooker approach offers forgiving temperature control and requires minimal babysitting. More experienced? The stovetop method gives you hands-on control over the entire process.
Remember, dosing cautiously is absolutely essential, especially with your first batch. Start with small amounts and give yourself time to understand how your infused oil affects you. I can’t stress this enough: it’s always easier to use more than to deal with an uncomfortably strong experience.
Here’s something I’ve learned through my own kitchen experiments: mistakes happen, and they’re honestly part of the learning curve. Maybe your first batch turns out weaker than expected, or you accidentally let the temperature climb too high. These aren’t failures; they’re valuable lessons that’ll make your next batch even better. Each time you make infused oil, you’ll gain confidence and develop intuition about the process.
The beauty of making your own cannabis-infused oils is that it truly does become easier with practice. What feels intimidating today will feel routine after a few batches. Keep exploring, stay curious, and don’t hesitate to browse our other CBD content for more guidance on your journey.